

Let's start with water play. Kids love playing with water. You can extend their play by adding a variety of tools to experiment with in the water table. Here students use ladles, measuring cups, droppers, sponges, and funnels to move water in and out of recycled plastic bottles of various shapes and sizes (as well as spin the water wheel). Kids also enjoy putting marbles in the bottles, or using the marbles to block water flow in the water wheel.

Here I added seashells and floating fish from Lakeshore Learning. I picked up some fish nets from the pet aisle at Walmart. Both the ice trays and seashells have numbers written on them. Students can find a shell and transfer it to the ice tray to make a number match. You can also include a glass fish bowl for collecting the fish with the nets.

One of the most popular activities at the water table is the pipes from Lakeshore Learning. I usually start by putting just the pipes in the table (no water). Students are challenged to build a pipe structure using ALL the pipes. When they are finished building, then I put water in the table so students can test their structure and see if it works. They can then keep improving their design.

At this point, you might add a fish bowl and challenge students to build a structure that will transfer the water into the bowl. It took several days of play to achieve this, but students were so proud when they solved the problem. They called everyone in the class over to come see their "water show".

Here are some favorite items for sand play at the table. Mini construction vehicles are popular. Here students mine for fools gold and precious stones, filling and dumping sand into recycled peanut butter jars.


With sandbox sand you have to add water to prevent dust from spreading
as the kids play, and to get the sand to stick together for building. The sandbox sand also has a strong earthy smell. Here students search for magnetic colored chips and letters using a magnet wand. Below are some dinosaur fossils from
Lakeshore Learning which are very popular with the kids.

I will say that I found the gritty sandbox sand gets stuck
between the ribs and bones of these dinosaurs, making them hard to
clean. So I only use the fine sand with the dinosaurs now (see below).

The fine sifting sand comes in many colors. For example, below I used blue sand to represent ocean water, hiding toy sharks and whales as well as authentic shark teeth (which I bought somewhere online). I got the colored sifting sand at Walmart.
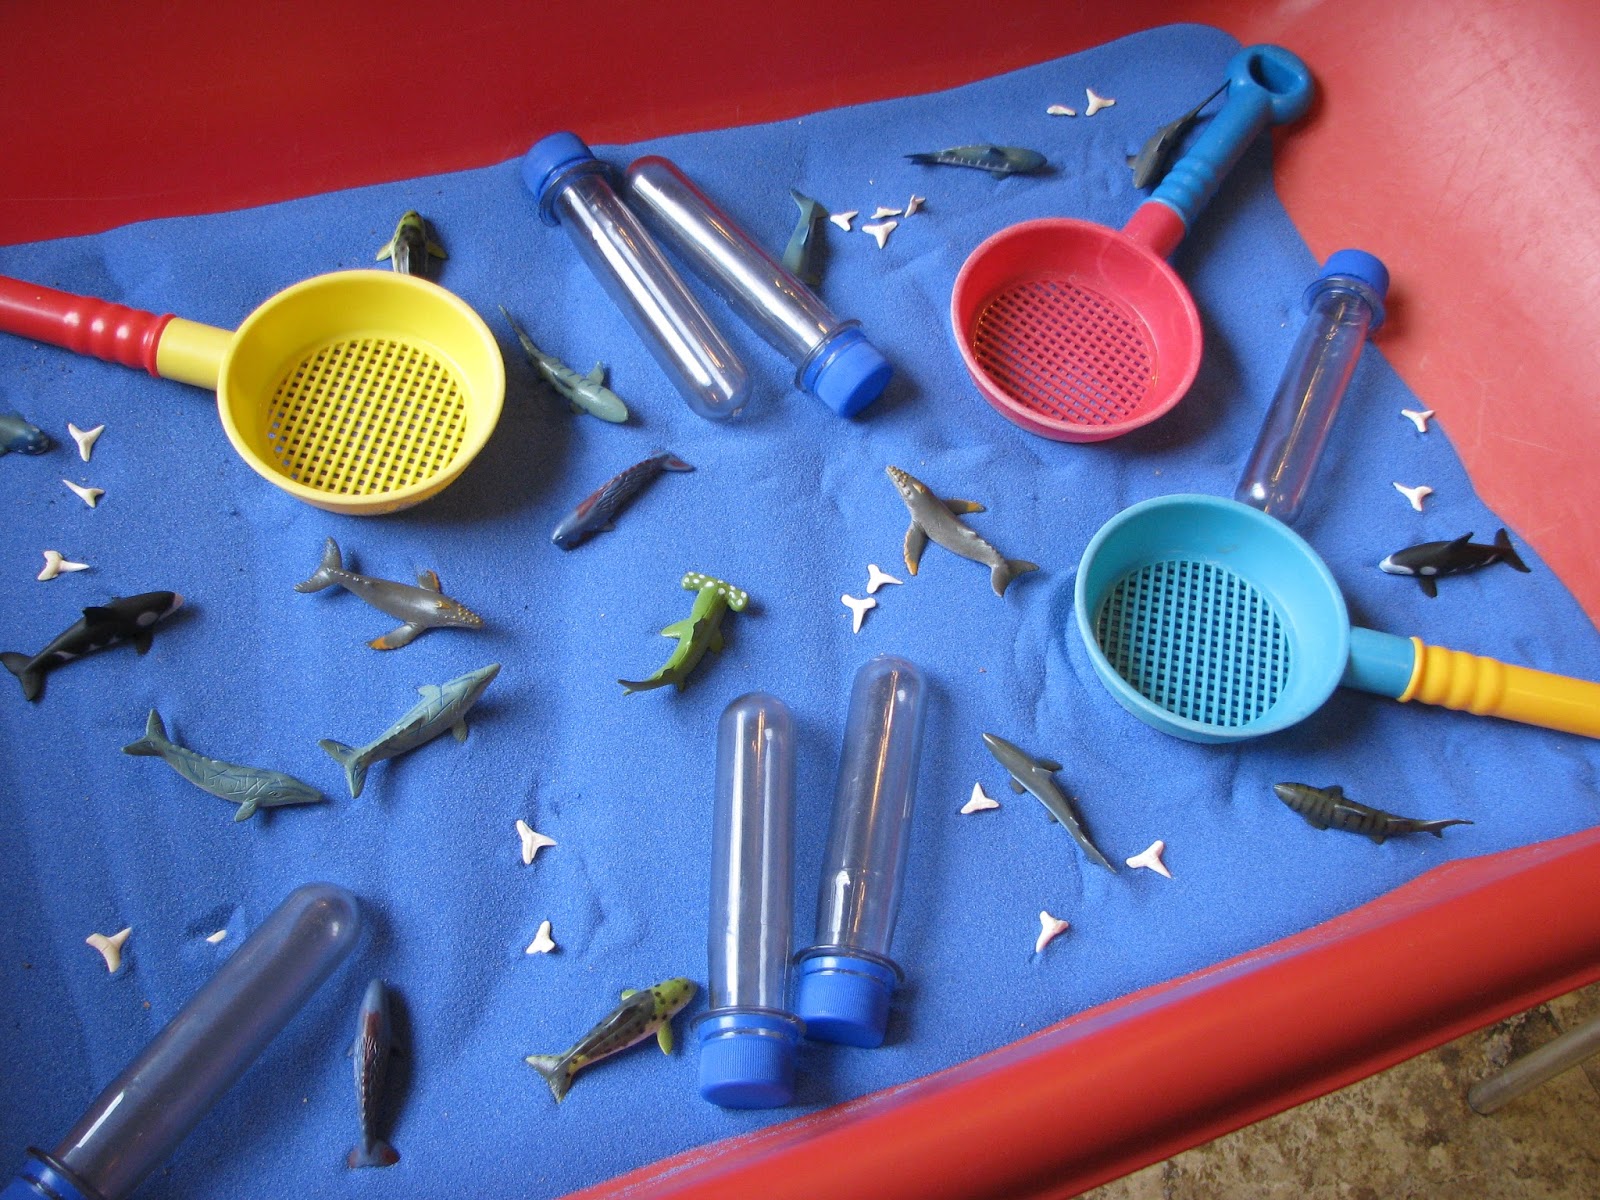
Here is a tip. Put exactly 20 items (e.g., shark teeth) in the table. This prompts students to count them and see if they have found them all. For example: We have 14 teeth! If there are 20 teeth, how many more do we still need to find? Also, test tubes help students feel like scientists. They can use them to collect the teeth they find. They love using the test tubes to collect things.

A third kind of sand is this modeling sand which is designed to be sticky. It also gets stuck in the dinosaur bones, but it works great with molds. Here students use molds to create letters and build words, as well as build sand castles. This
Mold and Play Sand feels moist and never dries out. You don't have to add water. Students love it. I would say it is their favorite sand.

Modeling sand is great, and
it's less expensive than kinetic sand (not shown here). The advantage of
kinetic sand is that it doesn't stick to your hands. Modeling sand
sticks to your hands a bit and requires washing off. But I prefer the cheaper price of the modeling sand.


Below is a kind of ground up corn cob or grits. It's not dusty. It's fun to use with the water wheel, but it hurts when you step on it. Motivation for the kids to keep it in the table! Just include a dust pan and brush for kids to clean up their mess. That can actually be the funnest part for them.


Here I added some farm animal counters and tongs for moving them. The tongs make the work feel challenging. Students can count or sort the animals by color into small cups. Using the tongs will help children develop their pincer grasp, a fine motor skill required for writing.
I really loved these tongs, but they didn't last long. The tongs are fragile and broke off after extended use. Finding good kitchen tongs may be a better option.


It's fun to freeze water then use rock salt and droppers filled with warm water to
melt the ice. Add plastic animals to the ice so students can rescue
them. I froze plastic dinosaurs in this ice block.


The sensory table makes each season fun. In the fall, take the kids for a nature walk to collect acorns and put them in the table with some autumn leaves (natural or silk leaves). Be sure to freeze the acorns overnight (to kill any worms inside) before you put them in your table.

Write letters on the acorns and add alphabet sticker labels to ice trays. When students find an acorn they can transfer it to the proper place in the ice cube tray and collect them all.

The table is great for carving pumpkins and counting pumpkin seeds. Then use the hollowed out pumpkin to make pumpkin soup.


Plastic spider rings can be fished out and collected using crazy
straws then sorted by color. Use recycled plastic lids to draw webs with
numbers. On Halloween, add a witches cauldron with dry ice as a pot for
making witches' brew.

Alphabet soup is fun any time of year. Try adding thermometers to the table, including one pot with hot water and one pot with ice cold water. Children will move the thermometer back and forth between the pots to watch the red line on the thermometer move up and down.


Children's books can often inspire you. After reading A Wish to Be a Christmas Tree, I added items to the table that were used by animals in the story. Again, they could use test
tubes here for collecting the items (snowflakes, glass beads, plastic beads, jingle bells). Magnetic wands were included here
for collecting jingle bells. Floating foam shapes were decorated, or
filled with items until they sunk. (Jingle bells will rust in water, so beware of that.)

 The winter favorite is definitely snow in the table. You can dilute liquid watercolor and use eye droppers or medicine droppers to color the snow. Food dye will work too but it's not washable like the liquid watercolor is. I get my liquid watercolor from Discount School Supply online.
 A related activity is color-mixing. Students start with only primary colors (red, yellow, and blue) then use droppers to mix the water in ice trays, creating dozens of unique and beautiful colors. Adding some dry ice turns this activity into a fun potion-making experience.


Here I used blue sand and included snowflakes, glass beads, and polar animals. Add test tubes for collecting found snowflakes and beads.


If you have kids that love to peel paper off crayons, put them to work on an old box of crayons at the sensory table. Melt the crayons in an oven mold to make a fun Valentine gift.


You can write letters on plastic Easter eggs and hide them in grass. Kids can group them in baskets, or place them in egg cartons to match the letter they have found.


Fill the table with soil and add worms. Students can make observations of worm behavior and take measurements to see which worm is the longest. I've also added soil from four different locations to compare and contrast, and used the table for planting sunflowers with students.

My kids are doing science here, testing the absorbency of different diapers using droppers and yellow colored water.

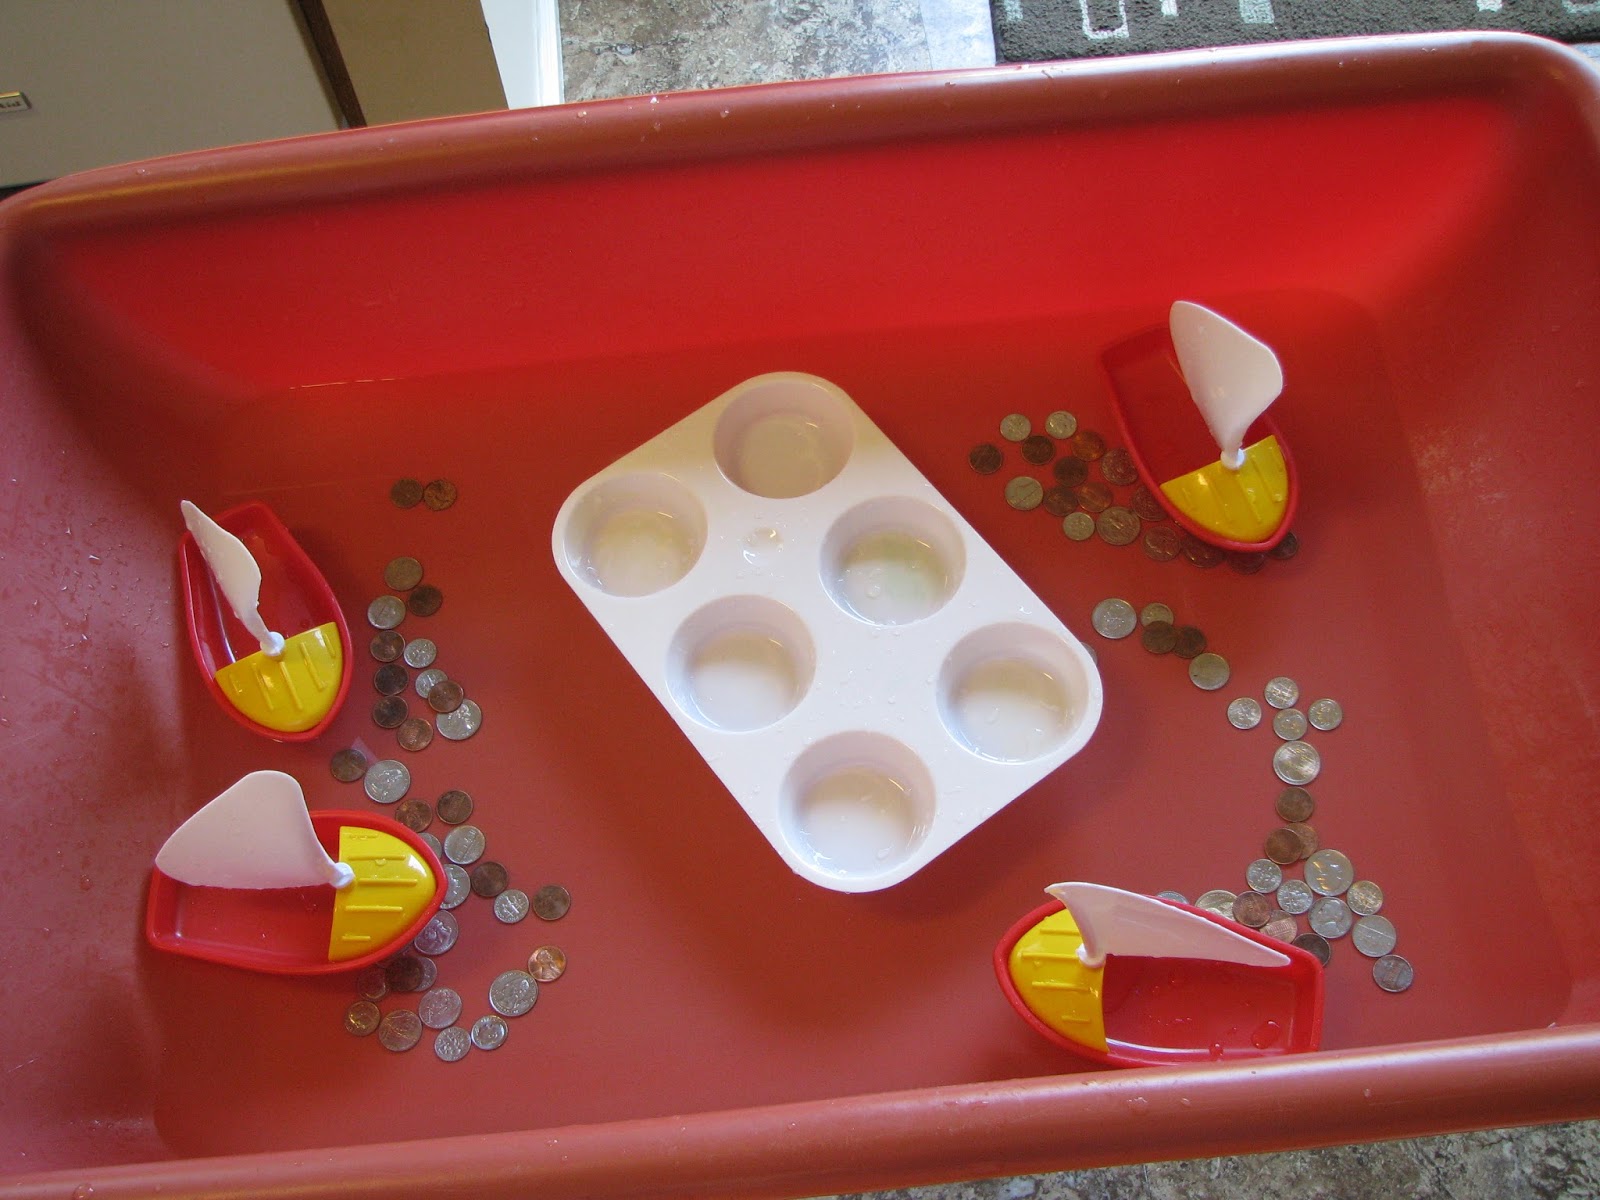
Sink and float experiments are always fun for preschool age children. How many coins does it take to sink the boat? Students can also count and sort pennies, nickels, dimes, and quarters.
Here my son searched for items around the house that he thought might sink or float then tested his hypothesis.

Blow bubbles in diluted paint to make a nice print for an art project.


Invite the neighbors over for a car and bike wash. Adding dish soap and sponges to the table gives kids an opportunity to do meaningful work.


Dough is great for the table. Add items for children to press and stamp into the dough.

For a cultural experience, add chopsticks for students to use with pom-poms. I include sand timers to add interest. Students can see how many pom-poms they can transfer into the jar in one minute. Other tools are included for comparison (tongs, tweezers, spoons). Pom-poms can also be sorted by color or size into the jars. (Any Montessori-inspired transfer activity can be adapted for the sensory table.)

Add small bowls and spoons and this activity will prompt drama play as well. Students play restaurant as they prepare salads, soups, and ice-cream.


Buttons and string can be made into snakes and necklaces (or sorted by color, size, and shape).


I hope these ideas have been helpful and have inspired you to purchase a sensory table of your own for the young children in your life. Children must play to learn! To see how I use the sensory table in context with our other learning experiences, please visit my new preschool blog here.